This is a basic implementation of XenDesktop Express 5.6, intended as a proof of concept. This is the edocs link for XenDesktop 5.6 by the way:
http://support.citrix.com/proddocs/topic/xendesktop-rho/cds-landing-page-xd56.html
XenDesktop 5.6 Express is essentially the trial version of XenDesktop and is limited to 10 VDI machines. This is a comparison of all the editions:
http://support.citrix.com/proddocs/topic/xendesktop-snma/cds-overview-editions-overview-wrapper.html
Download XenDesktop Express from your My Citrix account – this is the direct link at the moment…
http://www.citrix.com/English/ps2/products/feature.asp?contentID=2308540
Click Try It Free and download the zip. This contains three ISOs, including XenServer. Extract the XenDesktop56.iso using 7zip or another program.
I’m installing the core components of XenDesktop on a XenServer virtual running on a fairly powerful server. The XenDesktop controller VM has got 2 vCPUs and 2gb RAM, running Windows Server 2008 R2. On the same XenServer farm, install a Windows 7 VM as well. This will later become your master VM.
When your XenDesktop server is installed, run AutoSelect from the root of the extracted XenDesktop56 folder, then when this menu eventually comes up, select Install XenDesktop….
Accept the EULA…
You then have a comprehensive list of options. You might well just click Next to install everything, but lets have a think about things first…
For a proof of concept, this might well all be best on the same server, but this is going to be a quite heavy set of applications, and there might be parts of this you don’t need. If you have a shared SQL Server machine, you can save quite a lot of load on the box by not installing SQL Server Express for instance – but you have extra steps to set up the database elsewhere. The license server part could well be existing elsewhere if you are running XenApp, though be aware that it needs to be v11.10, the version which shipped with XenApp 6.5, not the XenApp 6.0 version or earlier. On a production system the other roles might well be split over multiple systems as well. For this simple implementation, I’ve left everything ticked.
The next screen lets you know that the windows firewall is going to be set up to allow the license server ports…
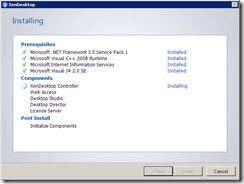
You then proceed to installation of the Windows features and XenDesktop components. This takes a while. Meanwhile in the background I connected to a shared SQL Server 2008 R2 machine, created a database manually and set up a SQL logon on it, with a really hard password. In User Mappings I gave this login db_owner access to the new database.
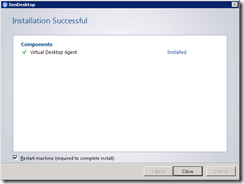
Click Close to configure XenDesktop. This took a full three minutes to come up…
Note that if you chose to not have the SQL Server Express R2 instance on this server, the whole Quick Deploy option is greyed out. Assuming it is enabled, click it.
Incidentally, this is the information on Quick Deploy:
http://support.citrix.com/proddocs/topic/xendesktop-rho/cds-quick-deploy-rho.html
As it states, these are the pre-requisites for completing Quick Deploy:
- A host with enough storage, CPU and RAM
- An admin account which can create new machines on the XenServer host
- Access to the AD domain containing the accounts of users
- An account on that AD domain with the right to create computer accounts
- A Master VM running the Virtual Desktop Agent
- The XenDesktop server you just installed, including all components.
You installed that Windows 7 VM earlier, right? The one that will be the Master VM. If not, get installing!
The first step of Quick Deploy is Site. Give your site a name and click next on the Wizard.
The next step is Connection. This is the connection to the virtualisation platform – either VMware, Hyper-V, or (more likely) XenServer. Fill in the details for your environment. In this case, I’m connecting to XenServer, so I put in http://[servername] and the root username and password. It won’t let you proceed unless these details are correct. After this you will see the Host screen, where you pick the Network your VMs should use (assuming multiple networks are defined) and the Storage screen where you pick where all the VMs you create will appear.
If you have not done this already, get your Windows 7 Master VM ready. Install the tools for whatever VM host you are on (so, the XenServer tools in my case)…
Join it to the AD domain and install any applications you want on all the machines. Then get the Virtual Desktop Agent installed. You can get to this by running the AutoSelect utility on the XenDesktop56 disk and clicking Install Virtual Desktop Agent…
Select Quick Deploy and agree to everything.
Back to the Quick Deploy wizard on the server, select the Master VM, the location to store the newly created VMs and allow it to create a couple of VMs, giving it a default location
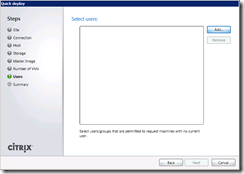
The next step is to allow users or groups to request VMs which do not have a specific user. Create an AD group and put a test user in it. Once you have tested this is working, this group will contain all your XenDesktop users.
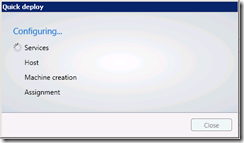
This churns away for about 10 minutes…
You should now see most of the configuration options in the Desktop Studio…
And should also notice its created extra virtual machines in XenServer which can be logged onto via the web interface, which you can now make secure in IIS if you see fit.
Then I decided to check it was licensed okay, and the fun really began. This is the post about that little issue:
http://zenapp.blogspot.co.uk/2012/09/xendesktop-56-expresslicensing.html


2 comments:
Hi there! Do you happen to have any blogging or it is a completely natural talent? Waiting forward to hear your answer.
Thanks for your tutorial. Please post new XenDesktop 6 version.
Post a Comment